 |
|
 |
Add a Reservationless Conference
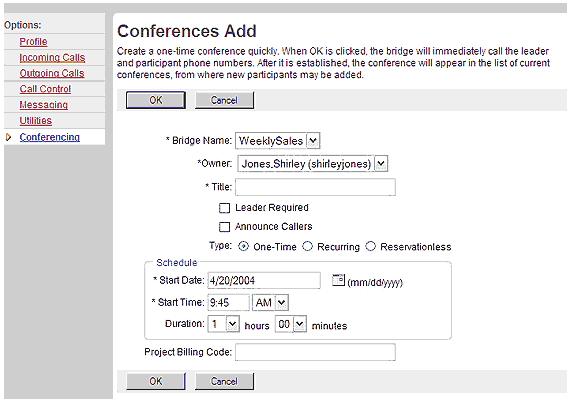
- On the User - Conferencing menu page click Conferences. The User - Conferences page displays the Current tab.
- Click Add. The User - Conferences Add page displays.
- Select a conference bridge from the Bridge Name drop-down list.
- Select an owner from the Owner drop-down list.
- Type a descriptive title for the conference. The title can be up to 80 characters.
- Check the Leader Required check box to specify that a leader is required to begin the conference. When checked, participants are put on hold until the leader has joined the conference.
- Check the Announce Callers to announce participants' names when they join the conference. When checked, participants' names are announced as they join the conference.
- Click the Reservationless conference type.
- Type the Start Date in month/day/year format or click on the calendar icon to select the date from the pop-up calendar. To select a date, click the calendar icon to the right of the text box for a date. On the calendar box, to change the month, click either of the inner circles with arrowheads. To change the year, click either of the outer circles with arrowheads. Then, click the day. The selected date displays in the text box.
- Specify the End Date (up to 26 weeks in advance) in month/day/year format or click on the calendar icon to select the date from the pop-up calendar. To select a date, click the calendar icon to the right of the text box for a date. On the calendar box, to change the month, click either of the inner circles with arrowheads. To change the year, click either of the outer circles with arrowheads. Then, click the day. The selected date displays in the text box.
- Type the Project Billing Code. This code can be up to 50 characters.
- Click OK. OK saves your changes and displays the previous page. To exit without saving, select another page or click Cancel to display the previous page.
Use the User - Conferences Add page to add a reservationless conference. A reservationless conference is open for up to six months. To add a reservationless conference, use the User - Conferences Add page as follows:
User - Conferences Add (a reservationless conference)
|
Best viewed with IE 5.0 and Netscape 6.0 & above. © SingTel All Rights Reserved.
|